Peel and stick wallpaper is a type of covering you hang glue-free and installer-free by simply peeling off the protective backing film. We produce it on two bases: a wipeable, kitchen- and bathroom-friendly foil (850 TL/m²) and a textured self-adhesive canvas (800 TL/m²).
An average accent wall takes two people just 1-2 hours with nothing but a squeegee and a utility knife; when you move, you warm it gently and peel it off without leaving a mark. It is the number-one choice of renters and DIYers.
Who Is It Ideal For?
- Renters: Since no glue touches the wall, there is no residue worry at move-out — the cornerstone of our renter's guide.
- DIY lovers: The installer cost (150-250 TL/m²) drops to zero; even for a first-timer, a single wall is an afternoon's work.
- Wet-area renovators: The foil base is the most durable surface for the kitchen backsplash and the bathroom.
- Frequent redecorators: Peeling off and refreshing is far less of a chore than with the classic system.
Step-by-Step Installation (6 Steps, 2 People)
1. Prepare the Wall
The surface must be dust-free, dry and flat. Let a washed wall dry for at least 24 hours; smooth satin-painted surfaces give ideal adhesion. If there is flaking old paint, scrape and sand it off.
2. Mark It Out
Draw the line for the first strip with a spirit level or laser. Wall corners are never plumb; align to the line, not to the corner.
3. Start From the Top, Peel Little by Little
Do not peel off the entire backing film — peel 20-30 cm from the top and stick. The film comes off bit by bit as the strip advances; peeling all of the film at once is the number-one cause of the sheet sticking to itself.
4. Squeegee From the Center Outward
Every 20-30 cm, push the air bubbles out by running the squeegee (or a stiff card) from the center toward the edges. A felt-edged squeegee will not scratch the surface.
5. It Forgives Mistakes: Lift, Reposition
The biggest advantage of this class: within the first 10-15 minutes the strip can be gently lifted and realigned. Do not try to rescue a crooked strip in place — lift it and correct it.
6. Trimming the Edges
Along the baseboard and ceiling line, a sharp utility knife plus a wide putty knife acts as a straightedge. Snap off the blade tip on every strip — a dull blade tears the edge. For general techniques, see the installation guide.
Removing Peel and Stick Wallpaper Without a Trace
Start from a corner and heat it with a hair dryer as you pull slowly at a 45-degree angle; the heat softens the adhesive and the wall paint stays put. Any rare leftover adhesive spots wipe away with isopropyl alcohol. For the full process, see the removal guide.
Compared to the Classic (Pasted) System
- Installation: Self-adhesive = installer-free, 1-2 hours; classic non-woven = needs paste plus experience (or a professional).
- Surface feel: Textile/non-woven leads on fabric texture; the self-adhesive foil is smooth, while the self-adhesive canvas is textured.
- Wet areas: Self-adhesive foil is the clear leader.
- Very large walls: For heights above 4 m, the classic system plus a professional gives a safer result.
For the decision matrix, see the selection guide; for material detail, the vinyl guide.
Adhesion Guide by Surface
The same product does not perform the same on every surface; you need to set expectations correctly. On satin/silicone paint and lacquered surfaces adhesion is excellent and stays put for years. On surfaces painted with distemper it holds well, but if the paint is chalking (leaving a white mark on your hand) it must first be washed and dried. On plasterboard it should not be used directly but only on painted plasterboard. On glass, mirror and grout-free tile it is flawless; on wooden furniture and MDF it gives great results. The places it does not hold are just as clear: limewash, chalking plaster, damp walls and rough concrete.
A Note on Season and Temperature
The chemistry of the adhesive is temperature-sensitive: the ideal application range is 15-28°C. In a cold room in winter (the unheated empty-flat scenario) the adhesive hardens and the initial grab weakens — heating the room for a few hours before applying closes the gap. In summer, on a wall in direct sun, avoid the midday hours; once the surface reaches 40 degrees the adhesive becomes too aggressive and your window for repositioning shrinks. If your boiler is running, winter is actually a good time to apply: dry air means a fast, bubble-free set.
Turning Corners
The point DIY users struggle with most is inside corners. The trick is not to turn the corner with a single piece: finish the strip so it overhangs the corner by 1-1.5 cm, fold the overhang into the corner, and start the new strip from the corner so it laps over the overhang. Since walls are not perfectly square in any home, single-piece turns inevitably produce diagonal creases. On outside corners it is the opposite — turn with a single piece and pull the squeegee down the corner in one top-to-bottom stroke.
Bonus Use: Covering Furniture and Doors
The same material is also the secret hero of furniture makeovers. Old hallway-cabinet doors, the backs of bookcases, the insides of cupboards and room doors can be covered in the same pattern as the wall or in a contrasting texture. Giving a cupboard back the same pattern as the wall in particular visually dissolves the mass and pulls the room together. The only difference is in the application: cutting the trim 2-3 mm inside the furniture edge stops the edge from lifting as the door opens and closes.
Can Removed Foil Be Reused?
The honest answer: partly. Foil removed carefully with heat stays physically intact, but it leaves part of its adhesive strength on the first surface. Small pieces (inside a cupboard, behind a shelf) will do the job a second time; a full-wall application is not guaranteed to deliver the same performance in the new home — the risk of early lifting at corners and edges increases. If a move is on the cards from the start, two strategies make sense: either pick a wall in the new home close to the size of the old one and take your chances, or treat the move as a chance to refresh and retire the old foil with a clear conscience. Most of our customers choose the second; after three or four years with a pattern, a change is wanted anyway.
Foil or Self-Adhesive Canvas?
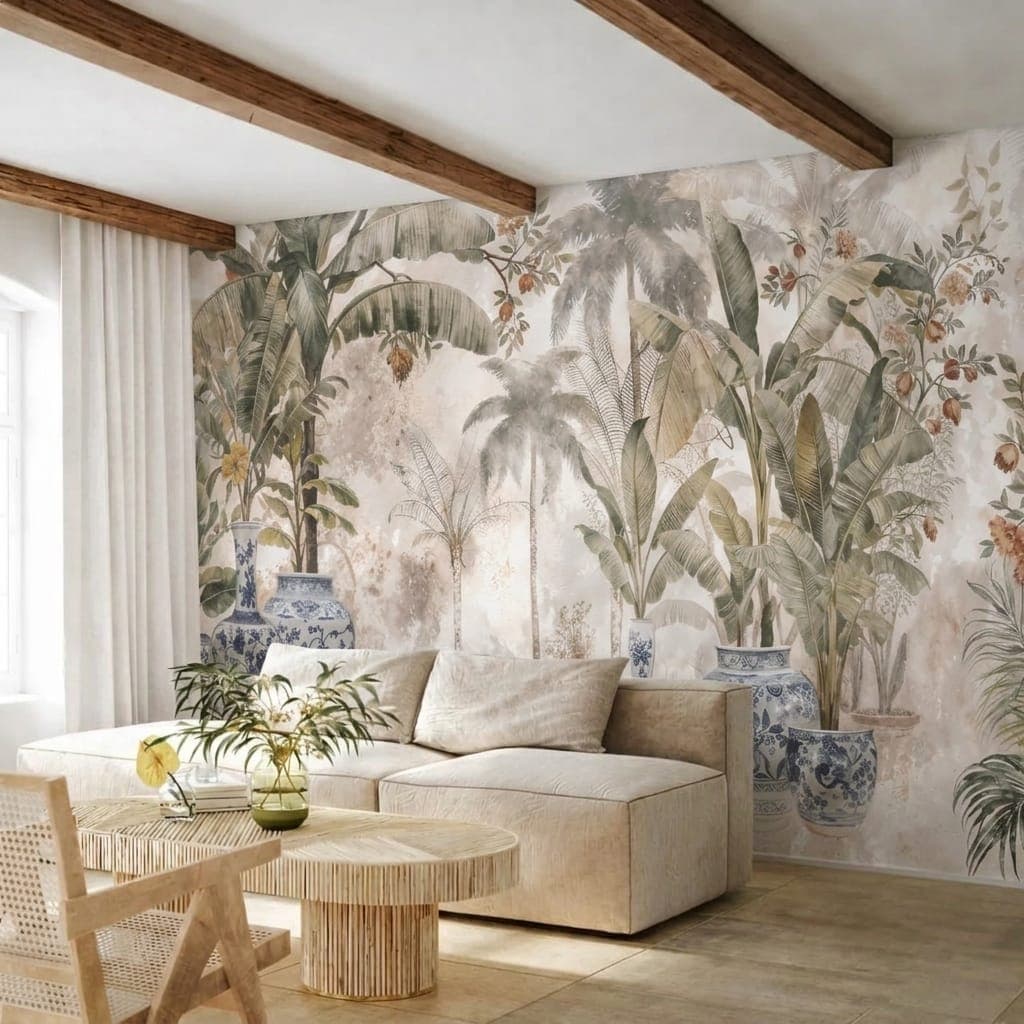
Our two self-adhesive bases are suited to different jobs. Foil (850 TL/m²) is the smoothest and most wipeable surface: the undisputed choice for the kitchen, bathroom, children's room and high-contact zones. Self-adhesive canvas (800 TL/m²) carries a canvas texture: moderate wipeability, high visual appeal — the product for those who want "self-adhesive but not looking like plastic" in the living room and bedroom. The decision formula in one sentence: the more often the surface will be wiped, lean toward foil; the more it will be looked at, lean toward canvas.
A Word of Encouragement for First-Timers
The real customer for this product is people who have never hung wall covering before, and the statistics are on their side: thanks to the repositioning tolerance, the success rate on a first attempt is very high. If you set the line of the first strip correctly and peel the film little by little, the rest is a simple rhythm built on repetition. Still, if you want extra peace of mind, start small: first a 1-2 square-meter area like the back of a cupboard or a backsplash, then the big wall. Everyone becomes an expert on the second project — our customer photos are the proof, which you can see on the reviews page.
Frequently Asked Questions
Does peel and stick wallpaper damage the wall?
On a sound surface painted with satin/silicone paint, removed with heat, no. On limewashed and flaking surfaces it can lift the paint, like any wallpaper — test a small patch first.
How long does it last?
Indoors it holds its form for 7-10 years; in the kitchen and bathroom, with regular wiping, 5+ years is standard.
How much does it cost?
Foil is 850 TL/m², self-adhesive canvas 800 TL/m² (2026). Small areas like a backsplash come to around 1,300 TL — the pricing is here, and for measuring, the m² guide.
What surfaces does it stick to?
Painted flat walls, plasterboard, MDF, glass and grout-free tile. It will not hold on rough plaster, limewash and chalking surfaces — these need primer/paint first.
Are the pattern options limited?
No — all of the 1000+ patterns in the catalogue can be printed on the self-adhesive base too; choose from the model guide and write "peel-and-stick" in the order note, or select that base on the product page.